Imagine standing under a starry sky where vibrant colors dance and swirl like a cosmic ballet. The northern lights, or aurora borealis, are nature’s spectacular light show, and capturing that beauty on paper can feel like a daunting task. But fear not! With just a few simple techniques and a sprinkle of creativity, anyone can transform a blank canvas into a mesmerizing night sky.
Understanding Northern Lights
Northern lights, known as aurora borealis, captivate many with their vibrant colors and dynamic movement. This phenomenon occurs when charged particles from the sun collide with the Earth’s magnetic field, creating stunning light displays in the polar regions.
What Are Northern Lights?
Northern lights represent a natural light display caused by solar winds. These winds consist of charged particles that interact with gases in the Earth’s atmosphere. Typically, this interaction produces a spectrum of colors including green, pink, and violet. When solar activity is strong, the auroras can extend towards lower latitudes, making them a breathtaking spectacle for more viewers.
Significance in Art
Northern lights significantly inspire artists around the world. Many painters and photographers capture their beauty through various mediums. The mesmerizing colors and movements offer unique challenges and opportunities for creative expression. Artists often use different techniques to depict the dynamic nature of the lights, granting viewers an imaginative glimpse of this natural wonder. As a result, artworks featuring this phenomenon often evoke feelings of awe and tranquility, deepening the appreciation for nature’s beauty.
Materials Needed
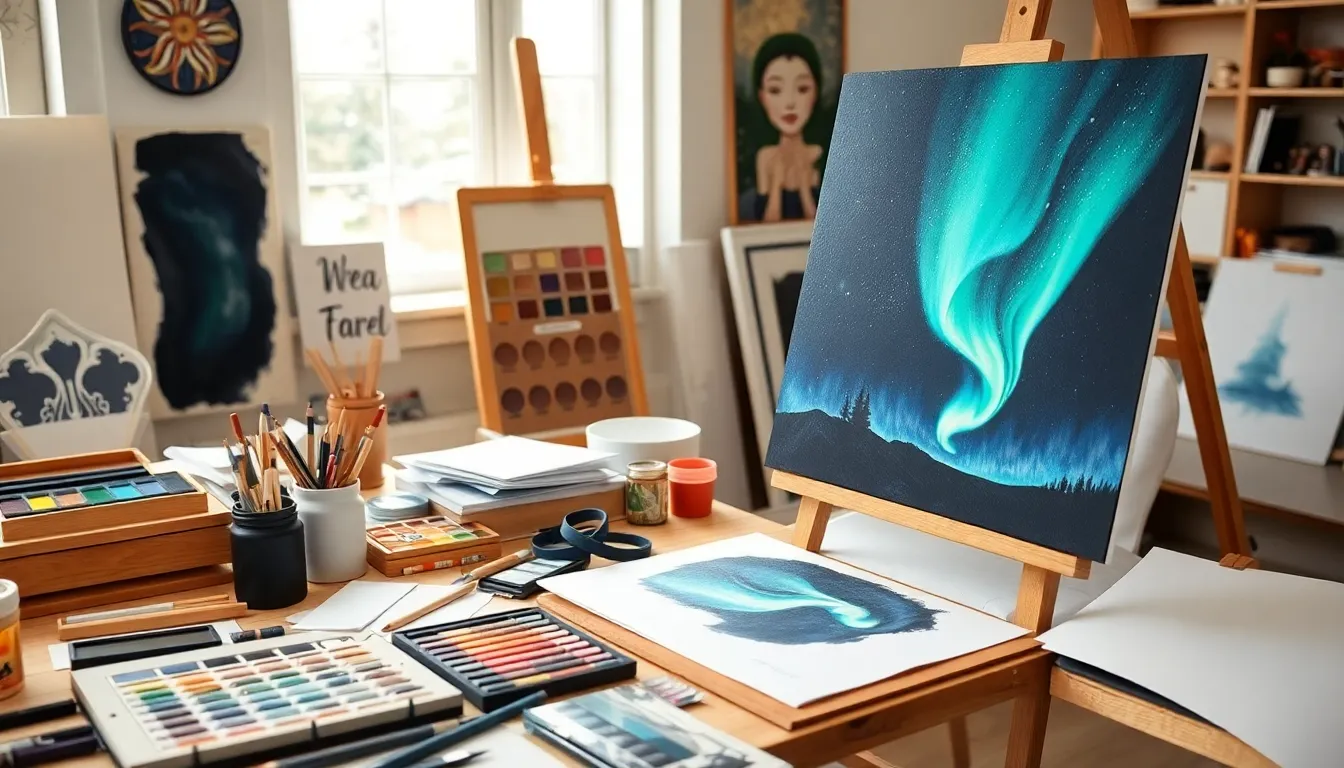
Gathering the right materials elevates the artistic experience when drawing northern lights. Start with the basics to prepare for a successful creation.
Choosing the Right Paper
Selecting suitable paper is crucial for achieving the desired effect in artwork. Watercolor paper offers texture that enhances blending, while smooth drawing paper allows for precise detailing. Artists often prefer heavier weight papers, usually in the range of 200 to 400 gsm, as these handle various mediums effectively. Experimenting with different types can yield unique results, so it’s beneficial to test before starting. Consider using black or dark-colored paper to provide a striking backdrop for bright colors, making the northern lights pop.
Selecting Your Medium
Choosing the right medium significantly impacts the final piece. Acrylic paints deliver vibrancy and blend well, creating fluid transitions that represent the auroras’ movement. Pastels provide a soft finish, ideal for depicting luminous effects without harsh lines. Graphite pencils can add depth and detail, especially for foreground elements. Watercolors offer a light, ethereal quality that mimics the delicate nature of time-luminous displays. Artists often mix mediums for added dimension, enhancing the overall appearance of the artwork.
Step-by-Step Guide
Creating a visual depiction of the northern lights involves a series of structured steps. Follow this guide to bring the auroras to life on your canvas.
Sketching the Basic Outline
Begin by lightly sketching the horizon and any foreground elements. Set your canvas or paper with a pencil, defining the landscape first. Artists often include mountains or trees, which help frame the scene. Next, establish the position of the northern lights in the sky. Use gentle, sweeping lines to represent the dynamic movement of the auroras. Focus on varying the curvature to imitate the natural flowing shape. Ensure that the composition allows the colors to shine vividly in later steps.
Adding Colors and Details
Select your chosen medium for the next phase. Acrylic paints often produce intense colors, while pastels create soft, blended effects. The palette should include vibrant greens, pinks, and violets, mimicking real auroras. Start with the lightest colors, layering them to achieve depth. Blend shades smoothly, allowing transitions that reflect the ethereal nature of the northern lights. Incorporate small details, like stars or clouds, to enhance realism. Combine light and dark colors thoughtfully, ensuring contrast that captures viewers’ attention.
Techniques for Realism
Achieving realism in northern lights artwork requires attention to detail and technique. Artists can employ various methods to enhance the visual impact and authenticity of their pieces.
Blending Colors
Blending colors effectively creates the rich and dynamic hues characteristic of the aurora borealis. Begin by layering different shades, focusing on smooth transitions between colors. Utilize either a blending stump or soft brushes to mix pigments. Soft pastels work well for creating gentle gradients, while acrylics offer vibrancy when layered carefully. Dabbing the brush lightly can also help maintain color intensity without muddying the hues. Artists should consider the direction of light, allowing for lighter shades near the aurora’s core and darker tones at the edges. This approach highlights the depth and movement within the lights, mimicking the natural flow of the phenomenon.
Creating a Mysterious Atmosphere
Creating a mysterious atmosphere amplifies the enchanting quality of the northern lights. Dark backgrounds can set the stage, enhancing the vibrancy of the auroras. Incorporating elements such as silhouetted trees or mountains adds depth, grounding the bright lights and evoking a sense of wonder. Utilizing soft, diffused edges around the auroras can emulate the ethereal nature of the lights, suggesting movement. Additionally, introducing subtle stars or a moon can enrich the night sky and enhance the composition’s overall mystique. Varying the opacity of colors also helps depict illumination, drawing the viewer into the scene.
Common Mistakes to Avoid
Artists often encounter challenges when attempting to depict the northern lights. Avoiding common pitfalls enhances the overall quality of the artwork.
Overworking Your Drawing
Overworking can dilute the vibrancy of the northern lights. When too many strokes or corrections are applied, the beauty of the colors tends to fade. It’s crucial to find a balance between refinement and spontaneity. Keeping the initial sketch light helps preserve the freshness of the design. Relying on layers rather than excessive blending creates a more authentic representation. Artists should step back frequently to assess their work, ensuring they maintain the intended impact without unnecessary embellishments. Overall, preserving the dynamic nature of the auroras relies on maintaining simplicity in the artistic process.
Using Too Many Colors
Using an overwhelming array of colors can lead to chaotic compositions. Focus on a few harmonious shades that reflect the essence of the auroras. Emphasizing greens, pinks, and violets captures the natural beauty without distraction. Selecting a limited color palette allows colors to stand out effectively. Harmonious color combinations evoke the magical quality of the northern lights, enhancing viewer engagement. Artists should also consider varying the intensity of selected colors to create nuances. Ultimately, achieving a striking effect comes from restraint, allowing the selected hues to glow with clarity against darker backgrounds.
Capturing the northern lights on canvas is a rewarding endeavor that invites creativity and exploration. With the right materials and techniques artists can bring this breathtaking phenomenon to life. Emphasizing color blending and layering ensures that the vibrant hues shine through against darker backgrounds.
By experimenting with various mediums and styles artists can develop their unique interpretations of the aurora borealis. The journey of creating these artworks not only enhances artistic skills but also deepens appreciation for one of nature’s most stunning displays. As artists embrace the challenge they’ll find joy in depicting the magic of the northern lights for others to admire.